A cookie banner on the site does not mean Consent Mode is working. It is common to find setups where the banner records a choice, but Google tags never receive it, or receive it after they have already fired. In that case the banner is decoration and the measurement is unchanged.
This post explains the four consent signals, why the default state must come first, how a CMP template fits into Tag Manager, the difference between basic and advanced mode, and how to verify the result. It is a technical guide and not legal advice, so decisions about what your visitors must consent to belong with your privacy advisor.
The four signals
Google documents the signals in its Tag Manager consent mode help page. The four that matter most for Google Ads and Google Analytics are:
- ad_storage: enables storage, such as cookies, related to advertising.
- analytics_storage: enables storage, such as cookies, related to analytics.
- ad_user_data: sets consent for sending user data related to advertising to Google.
- ad_personalization: sets consent for personalized advertising.
The last two are the additions that make up version 2. Google’s guidance for traffic in the European Economic Area is that consent choices need to be passed through to Google tags, so a setup that only sends the first two signals is incomplete. Three further types exist (functionality_storage, personalization_storage and security_storage), but most marketing setups start with the four above.
The default state comes first
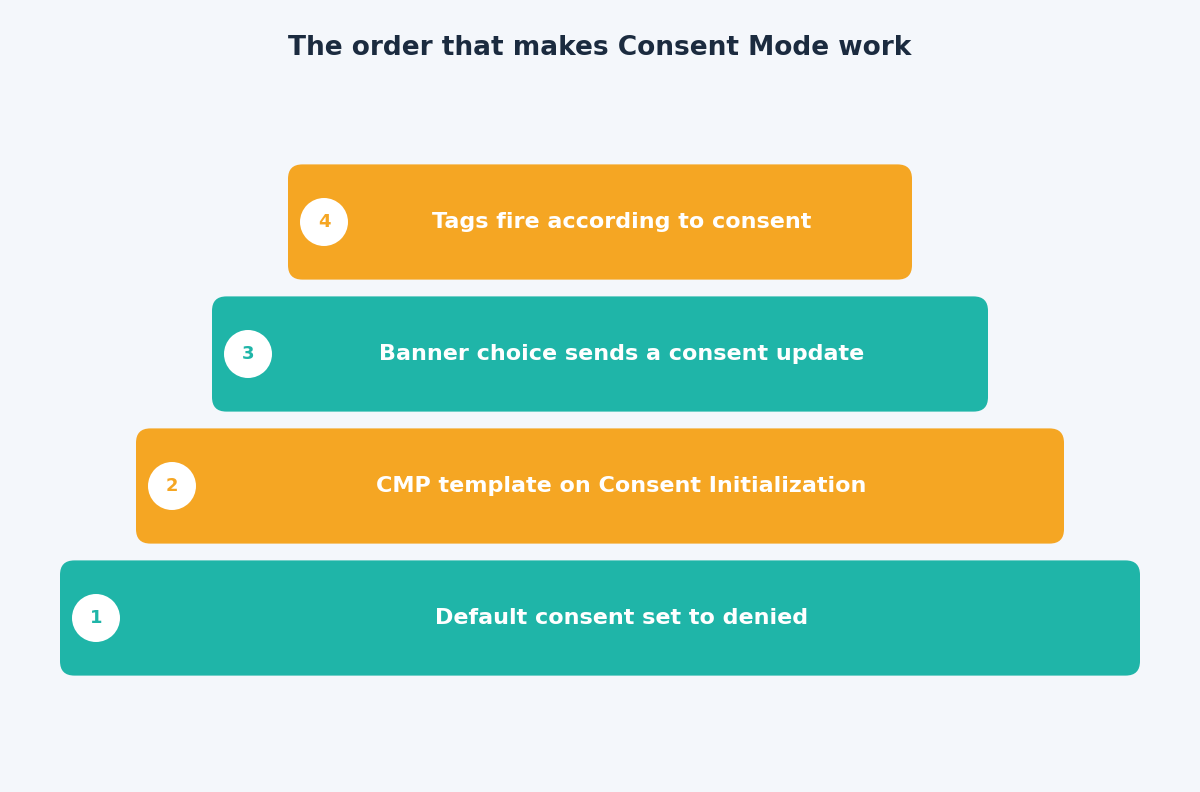
Every page needs a default consent state that is set before any tag sends measurement data. Google’s consent mode developer guide states the rule plainly: call the default command on every page before any command that sends measurement data, because if the consent code runs out of order, the defaults do not work.
In Tag Manager this is what the Consent Initialization trigger is for. It is designed so that consent settings are honored before any other trigger fires, and every web container includes a “Consent Initialization – All Pages” trigger. Two options are worth knowing:
- Region-specific defaults. You can set different defaults by region, using ISO 3166-2 codes, and the more specific region takes effect.
- wait_for_update. Google’s example gives an asynchronous consent tool 500 milliseconds to send its update before tags proceed.
Basic versus advanced mode
The difference is what happens before the visitor makes a choice. In basic mode, Google tags are prevented from loading until the visitor interacts with the banner, so nothing is sent to Google beforehand. In advanced mode, Google tags load when the page opens, with the default state set to denied, and send cookieless pings while consent is denied.
Google’s consent mode setup page says advanced mode enables advertiser-specific conversion modeling, while basic mode relies on a general model. Google’s Analytics documentation also describes behavioral modeling as available with advanced mode.
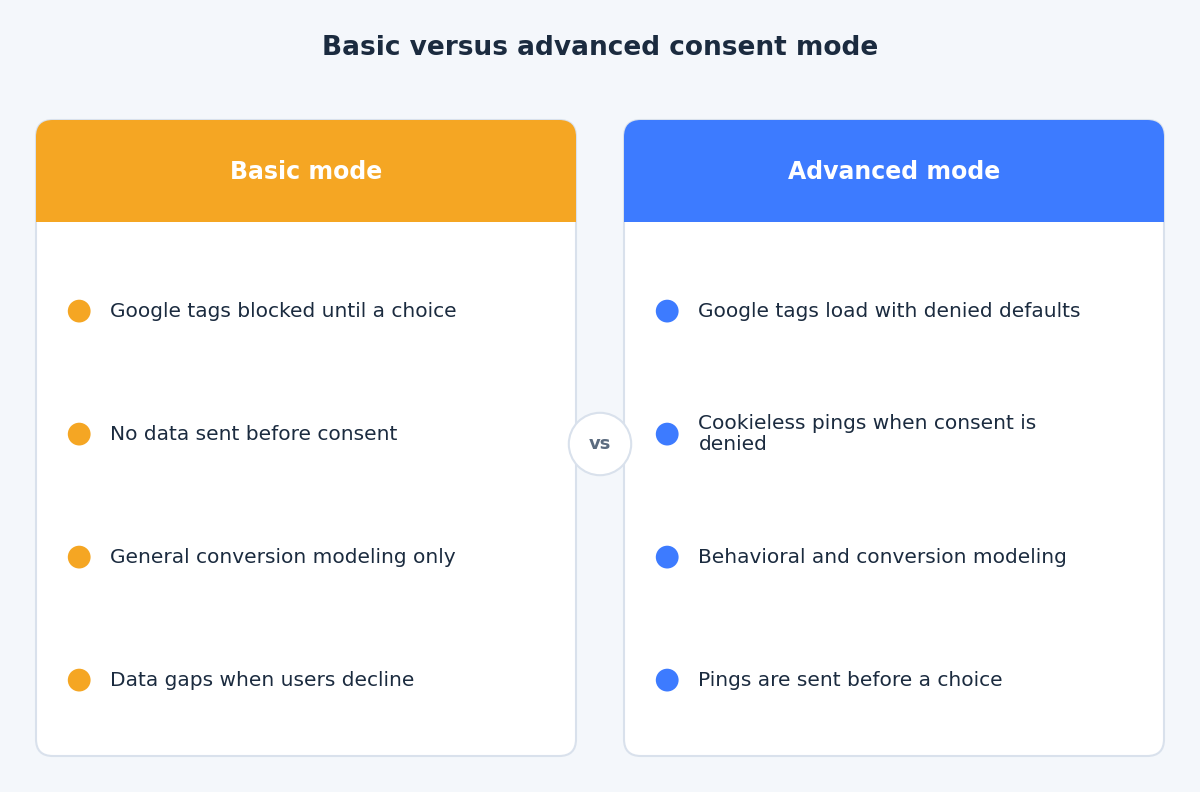
Advanced mode sends pings before a choice is made, so it is a privacy decision as well as a measurement one. Agree it with your legal advisor, then configure the CMP to match.
Set it up with a CMP template
Most consent management platforms publish a Tag Manager template in the Community Template Gallery. A typical setup looks like this:
- Add the CMP’s template and confirm it explicitly supports all four signals.
- Set the defaults inside the template: denied for the regions where consent is required, with a sensible wait_for_update value.
- Fire the template on the Consent Initialization trigger, not on All Pages.
- Map the banner’s categories to the signals, for example marketing to ad_storage, ad_user_data and ad_personalization, and statistics to analytics_storage.
- Open the Consent overview in Tag Manager and review every tag under “Consent Not Configured”.
Google’s own tags have built-in consent checks. For other tags, use the additional consent checks in each tag’s advanced settings to require a specific consent type before the tag fires.
How to verify it is working
Do not trust the banner’s own status screen. Check what the page does:
- Open Preview and the Consent tab. In Tag Assistant, the Consent tab shows the state on page default and after an update. Google’s troubleshooting guide says to confirm all four parameters appear in both columns. An empty tab means consent mode is not implemented on the page.
- Check the order. Tag Assistant reports an error when a tag reads the consent state before a default was set. If you see it, your CMP template is firing too late.
- Test three visits. Use a fresh browser profile and run it once with no choice, once accepting everything and once rejecting everything. Note which tags fire and which cookies appear.
- Read the network requests. Google’s requests carry consent parameters, commonly
gcsandgcd, that show the state a hit was sent with. Under a rejected choice they should reflect denied. - Repeat across pages. The update must also survive page transitions, so click through to a second page and look again.
Mistakes we look for first
- The CMP template fires on All Pages instead of Consent Initialization.
- Only ad_storage and analytics_storage are mapped, so the two v2 signals are missing.
- Non-Google tags that have no consent check at all and fire regardless of the banner.
- One global default with no regional logic, when the business serves several markets.
The takeaway
Consent Mode works when the order is right: a denied default first, the CMP on the Consent Initialization trigger, an update after the choice, and tags that respect it. If you would like a second pair of eyes on your consent setup, the contact page is the easiest way to reach us.
Related reading
- Debugging Google Tag Manager with Preview mode: a repeatable routine for finding tag problems.
- GTM container hygiene: naming, versions, workspaces and permissions.
- Enhanced conversions for web: setup methods and diagnostics for hashed first-party data.